|
|
.
|
|
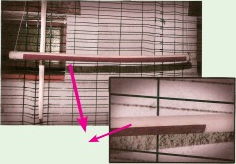
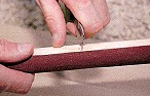
1. Sand perches are expensive and hurtful. Use sand paper to cover the under-half of the perches so the birds' nails will be trimmed automatically without hurting their feet. Choose perches of the right size that allow their nail tips just to touch the sandpaper underneath. Use finer or coarser sandpaper, according to the bird's size. If different grit sandpaper cannot be found, then coarser sandpaper is okay for both big and small birds, but finer sandpaper is not suitable for big birds.
You have to ask for non-toxic glue (so even children can eat it without harm!). If the glue doesn't stick to the perch, secure with painter's tape around the sandpaper to keep it in place until glue dries (five hours to overnight, depending on the brand).
Remove painter's tape, and voil! |
|
Use sand paper to cover the under-half of the perches. |
| |
**Note 1: Nothing lasts forever with their beaks (even hard perches). So please repeat the same process after eaten up. |
|
| |
|
|
|
|
|
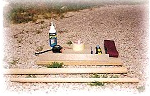
1. Materials: Perch, non-toxic glue, sandpaper, painter's tape, measuring tape, pen, blade cutter, ruler or straight-edged object. |
|
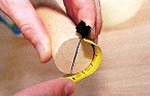
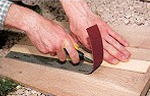
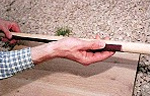
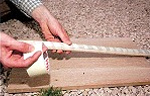
2. Measure 1/2 the circumference of the perch. |
|
3. Mark the measurement on sandpaper. |
| |
|
|
|
|
|
|
|
|
|
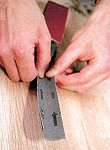
4. Cut sandpaper to the right size. |
|
5. Bend sides a little to accommodate perch. |
|
6. Apply glue on back side of sandpaper. |
| |
|
|
|
|
|
|
|
|
|
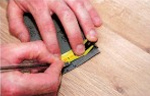
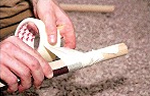
7. Press sandpaper onto perch gently, so as not to hurt your skin (can use working gloves). |
|
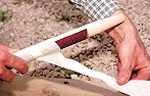
8. Wrap painter's tape tightly around perch. |
|
9.
till the end of sandpaper section. |
| |
|
|
|
|
|
|
|
|
|
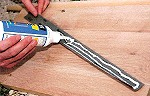
10. After glue dries, peel away painter's tape. |
|
11. Scrape off excess dried glue. |
|
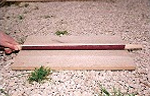
12. Finished perchready to use! |
| |
|
| |
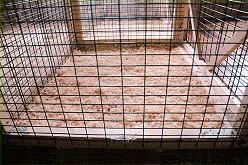
2. Use wood shavings (same packets used as bedding and litter for rabbits, etc.) to line the bottom of birdcages. It's very easy to scoop away every day and keep clean. Change the entire bedding every 10 days.
The wood deodorizes and absorbs any birds' waste more than other kinds of materials.
Removing the bottom mesh from the cage would be best. This is so that if the bird falls, he lands on a soft bed of wood shavings instead of hard metal, therefore not getting hurt or injured.
|
|
| |
** Note 2 : If you have pets, use only mixed vinegar-water solution (50%-50%) to clean houses, cages, perches, etc
And use non-toxic skin cream to avoid causing illness to your beloved dogs, cats, birds, etc
when they come in contact with it through your handling daily.
|
~ Helpful Tips, The Supmere Master Ching Hai News No.170 |
|
|